
In today’s world, creating a robust and scalable backend application is essential for the success of any modern application. RESTful APIs have become the de facto standard for communication between client-side and server-side applications. NestJs is a powerful framework that simplifies the creation of such APIs. In this article, we will provide a step-by-step guide on building REST APIs with NestJs and MongoDB.
Table of Contents
Prerequisites
Before we get started, you need to have some basic knowledge of:
- TypeScript
- NodeJs
- MongoDB
Setting up the Environment
Let’s start by setting up our development environment. We will be using NodeJs, so make sure you have it installed on your system. We will also use npm to manage our dependencies. Once you have installed NodeJs, open your terminal and run the following command to install NestJs CLI globally:
1 2 3 | npm i -g @nestjs/cli |
Next, we will create a new NestJs project. Run the following command in your terminal:
1 2 3 | nest new nest-mongodb |
This will create a new NestJs project with the name nest-mongodb. Navigate to the project directory by running:
1 2 3 | cd nest-mongodb |
We will be using the official MongoDB driver for NodeJs called mongoose. Install it by running the following command:
1 2 3 | npm i mongoose |
Next, we have to install the inbuilt package from NestJs library @nestjs/mongoose
1 2 3 | npm i @nestjs/mongoose |
Creating the API
Let’s create a simple API to manage users. We will have the following endpoints:
- GET /users
- GET /users/:id
- POST /users
- PUT /users/:id
- DELETE /users/:id
First, let’s create a user model. Create a new file called user.model.ts in the src directory and add the following code:
1 2 3 4 5 6 7 8 9 10 11 | // user.model.ts import { Document } from 'mongoose'; export interface User extends Document { readonly name: string; readonly email: string; readonly password: string; } |
Next, let’s create a user schema. Create a new file called user.schema.ts in the src directory and add the following code:
1 2 3 4 5 6 7 8 9 10 11 | // user.schema.ts import * as mongoose from 'mongoose'; export const UserSchema = new mongoose.Schema({ name: { type: String, required: true }, email: { type: String, required: true }, password: { type: String, required: true }, }); |
Now, let’s create a user service. Create a new file called user.service.ts in the src directory and add the following code:
1 2 3 4 5 6 7 8 9 10 11 12 13 14 15 16 17 18 19 20 21 22 23 24 25 26 27 28 29 30 31 32 33 34 | // user.service.ts import { Injectable } from '@nestjs/common'; import { InjectModel } from '@nestjs/mongoose'; import { Model } from 'mongoose'; import { User } from './user.model'; @Injectable() export class UserService { constructor(@InjectModel('User') private readonly userModel: Model<User>) {} async findAll(): Promise<User[]> { return await this.userModel.find().exec(); } async findOne(id: string): Promise<User> { return await this.userModel.findById(id).exec(); } async create(user: User): Promise<User> { const createdUser = new this.userModel(user); return await createdUser.save(); } async update(id: string, user: User): Promise<User> { return await this.userModel.findByIdAndUpdate(id, user, { new: true }); } async delete(id: string): Promise<User> { return await this.userModel.findByIdAndRemove(id); } } |
We are using the @nestjs/mongoose package to inject the User model into our service. The findAll, findOne, create, update, and delete methods correspond to the endpoints we will be creating.
Next, let’s create a user controller. Create a new file called user.controller.ts in the src directory and add the following code:
1 2 3 4 5 6 7 8 9 10 11 12 13 14 15 16 17 18 19 20 21 22 23 24 25 26 27 28 29 30 31 32 33 34 35 36 37 | // user.controller.ts import { Controller, Get, Post, Put, Delete, Body, Param } from '@nestjs/common'; import { UserService } from './user.service'; import { User } from './user.model'; @Controller('users') export class UserController { constructor(private readonly userService: UserService) {} @Get() async findAll(): Promise<User[]> { return this.userService.findAll(); } @Get(':id') async findOne(@Param('id') id: string): Promise<User> { return this.userService.findOne(id); } @Post() async create(@Body() user: User): Promise<User> { return this.userService.create(user); } @Put(':id') async update(@Param('id') id: string, @Body() user: User): Promise<User> { return this.userService.update(id, user); } @Delete(':id') async delete(@Param('id') id: string): Promise<User> { return this.userService.delete(id); } } |
We are using the @nestjs/common package to define our endpoints. The findAll, findOne, create, update, and delete methods correspond to the methods in our UserService.
Finally, let’s connect to our MongoDB database. Open the app.module.ts file in the src directory and add the following code:
1 2 3 4 5 6 7 8 9 10 11 12 13 14 15 16 17 18 19 | // app.module.ts import { Module } from '@nestjs/common'; import { MongooseModule } from '@nestjs/mongoose'; import { UserController } from './user.controller'; import { UserService } from './user.service'; import { UserSchema } from './user.schema'; @Module({ imports: [ MongooseModule.forRoot('mongodb://localhost/nest-mongodb'), MongooseModule.forFeature([{ name: 'User', schema: UserSchema }]), ], controllers: [UserController], providers: [UserService], }) export class AppModule {} |
We are using the @nestjs/mongoose package to connect to our MongoDB database using the URI mongodb://localhost/nest-mongodb. We are also registering our User model with MongooseModule.
Testing the API
We have now created our API. Let’s test it by running the following command:
1 2 3 | npm run start:dev |
This will start our NestJs application. Open your browser and go to http://localhost:3000/users. You should see an empty array. Let’s create a user by sending a POST request. You can use any REST client like Postman or Insomnia. Send a POST request to http://localhost:3000/users with the following JSON body:
1 2 3 4 5 6 7 | { "name": "John Doe", "email": "john.doe@example.com", "password": "password" } |
You should get a response with the created user object. Let’s get all users by sending a GET request to http://localhost:3000/users. You should see an array with the created user object. You can test the other endpoints in a similar way.
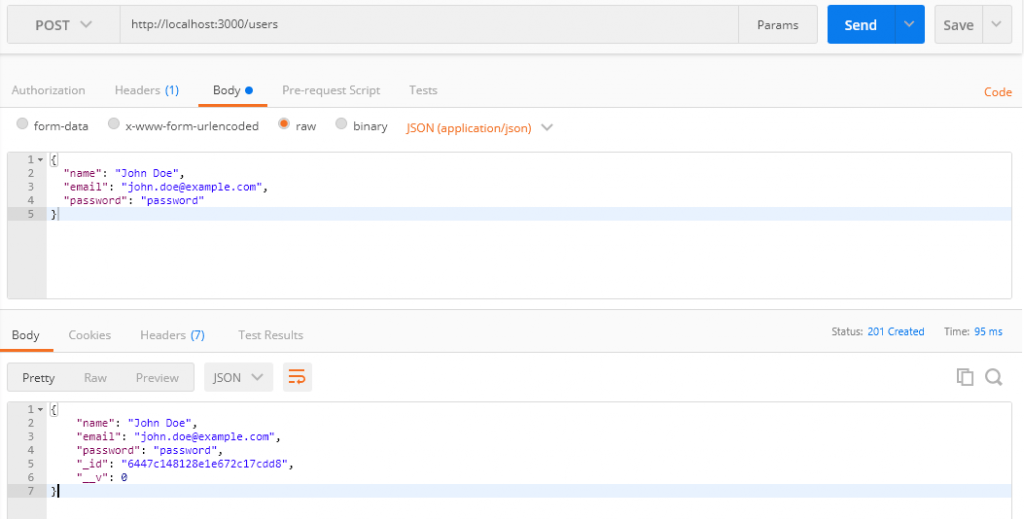
The screenshot displayed above depicts a call made from Postman to the “POST” API of a user creation endpoint, which in turn adds a new user to a MongoDB database.

The screenshot displayed above depicts the GET users api showing user result created from POSTMAN.
Conclusion
In this article, we have learned how to build RESTful APIs with NestJs and MongoDB. We created a simple API to manage users and used the official MongoDB driver for NodeJs called mongoose. We created a user model, a user schema, a user service, and a user controller. We also connected to our MongoDB database using MongooseModule. We tested our API using a REST client like Postman or Insomnia. NestJs provides a powerful and flexible framework for creating robust and scalable RESTful APIs.
Building REST APIs with NestJs and MongoDB using the Mongoose plugin is easy to implement. Subscribe to my newsletter so that you get emails to the most exciting articles published on NestJs.

")


