NestJs is a powerful framework for building scalable, server-side applications. It is built on top of Node.js and is inspired by Angular, which makes it an excellent choice for developers who are already familiar with Angular.
In this beginner’s guide, we will take a closer look at NestJs and provide an overview of its key features, including its architecture, modules, and controllers. We will also walk through the process of setting up a basic NestJs application and creating a simple API endpoint.
Table of Contents
What is NestJs?
NestJs is a server-side framework for building scalable, enterprise-grade applications. It is built on top of Node.js and is designed to provide a robust set of features for building complex, server-side applications. NestJs is inspired by Angular, which makes it an excellent choice for developers who are already familiar with Angular.
NestJs Architecture
NestJs uses a modular architecture that is designed to make it easy to build complex, scalable applications. At its core, NestJs is built using a set of modules, which are collections of related components that can be easily plugged into your application. Each module is responsible for a specific set of tasks, such as handling HTTP requests or connecting to a database.
NestJs Modules
Modules are the building blocks of a NestJs application. They are designed to be self-contained and can be easily plugged into your application. Each module can contain components, controllers, providers, and other related files.
1 2 3 4 5 6 7 8 9 10 11 12 | import { Module } from '@nestjs/common'; import { AppController } from './app.controller'; import { AppService } from './app.service'; @Module({ imports: [], controllers: [AppController], providers: [AppService], }) export class AppModule {} |
In the example above, we have defined a basic module for our NestJs application. The module contains an AppController and an AppService, which we will define next.
NestJs Controllers
Controllers are responsible for handling incoming HTTP requests and returning responses to the client. Controllers are defined within modules and are responsible for specific routes or groups of routes.
1 2 3 4 5 6 7 8 9 10 11 12 13 14 | import { Controller, Get } from '@nestjs/common'; import { AppService } from './app.service'; @Controller() export class AppController { constructor(private readonly appService: AppService) {} @Get() getHello(): string { return this.appService.getHello(); } } |
In the example above, we have defined a basic AppController. The controller handles incoming HTTP requests to the root route (/) and returns a simple string response.
NestJs Providers
Providers are a key component of a NestJs application. They are used to inject dependencies into components, such as controllers or services. Providers can be defined within modules and can be easily injected into other components.
1 2 3 4 5 6 7 8 9 10 | import { Injectable } from '@nestjs/common'; @Injectable() export class AppService { getHello(): string { return 'Hello World!'; } } |
In the example above, we have defined a basic AppService. The service contains a single method (getHello()) that returns a simple string response.
Getting Started with NestJs
To get started with NestJs, we first need to install the NestJs CLI:
1 2 3 | npm install -g @nestjs/cli |
Once we have installed the CLI, we can create a new NestJs application using the nest new command:
1 2 3 | nest new my-app |
This will create a new NestJs application in a directory named my-app. Once the application has been created, we can start the development server using the npm run start:dev command:
1 2 3 4 | cd my-app npm run start:dev |
This will start the development server, and we can now access our application at http://localhost:3000.
Creating a Simple API Endpoint
Now that we have our NestJs application set up, let’s create a simple API endpoint that returns a list of users. To do this, we will first create a new module:
1 2 3 4 5 6 7 8 9 10 11 12 13 | // users.module.ts import { Module } from '@nestjs/common'; import { UsersController } from './users.controller'; import { UsersService } from './users.service'; @Module({ controllers: [UsersController], providers: [UsersService], }) export class UsersModule {} |
In the example above, we have defined a new UsersModule that includes a UsersController and a UsersService.
Next, let’s define our UsersController:
1 2 3 4 5 6 7 8 9 10 11 12 13 14 15 16 | // users.controller.ts import { Controller, Get } from '@nestjs/common'; import { UsersService } from './users.service'; @Controller('users') export class UsersController { constructor(private userService: UsersService) {} @Get() async getUsers() { return this.userService.getUsers(); } } |
In the example above, we have defined a simple UsersController that handles incoming HTTP requests to the /users route.
Let’s define our UsersService:
1 2 3 4 5 6 7 8 9 10 11 12 13 14 15 | // users.service.ts import { Injectable } from '@nestjs/common'; @Injectable() export class UsersService { async getUsers() { return [ { id: 1, name: 'John Doe' }, { id: 2, name: 'Jane Doe' }, ]; } } |
In the example above, we have defined a simple UsersService that returns a list of users.
Finally, let’s import UsersModule into AppModule.
1 2 3 4 5 6 7 8 9 | import { Module } from '@nestjs/common'; import { UsersModule } from './users/users.module'; @Module({ imports: [UsersModule] }) export class AppModule {} |
In the example above, we have imported UsersModule into AppModule imports.
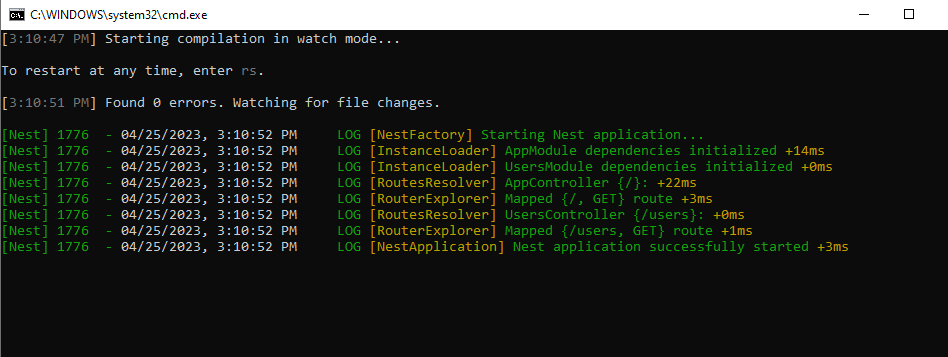
Now, if we restart our development server and navigate to http://localhost:3000/users, we should see a JSON response with our list of users.


Check the output in the above screenshot when you open the url in browser.
Conclusion
NestJs is a powerful framework for building scalable, server-side applications. In this beginner’s guide, we provided an overview of NestJs and its key features, including its architecture, modules, and controllers. We also walked through the process of setting up a basic NestJs application and creating a simple API endpoint.
If you are interested in learning more about NestJs, we recommend checking out the official NestJs documentation, which provides detailed information on the framework’s features and capabilities.


