

AWS S3 is a Simple Storage Service powered by Amazon Web Services. It provides object storage service and serves you the files in a faster way whenever accessed. AWS S3 with CloudFront is a great tool to speed up website performance. In this tutorial, we will learn how to improve website speed with AWS S3 and CloudFront.
This tutorial will help optimize the Angular application for scaling: 5 Best Ways To Optimize Angular For Scaling
Before diving into the tutorial, let’s read some basic questions.
What is AWS S3
S3 stands for Simple Storage Service. It is a service powered by Amazon Web Service for object storage on the cloud. It is static file storage. S3 is best to store any type of static files like images, js, css, html, xml, doc, and many more.
What is CloudFront
CloudFront is a cloud service powered by Amazon Web Services. It is used to speed up the contents such as html, css, js, images by delivering it through worldwide nearest datacenters. When a user requests content that is serving from CloudFront, the request is routed to the nearest edge location (edge location is the datacenter around the world) that provides the lowest latency (time delay), so that content is delivered with the best possible performance.
There could be two possibilities:
- If the content is already in the edge location with the lowest latency, CloudFront delivers it immediately.
- If the content is not in that edge location, CloudFront retrieves it from the origin and delivers to user.
Improve Website Speed With AWS S3 and CloudFront
Follow the steps below to implement AWS S3 and CloudFront in your application to speed up the performance.
Setup AWS S3
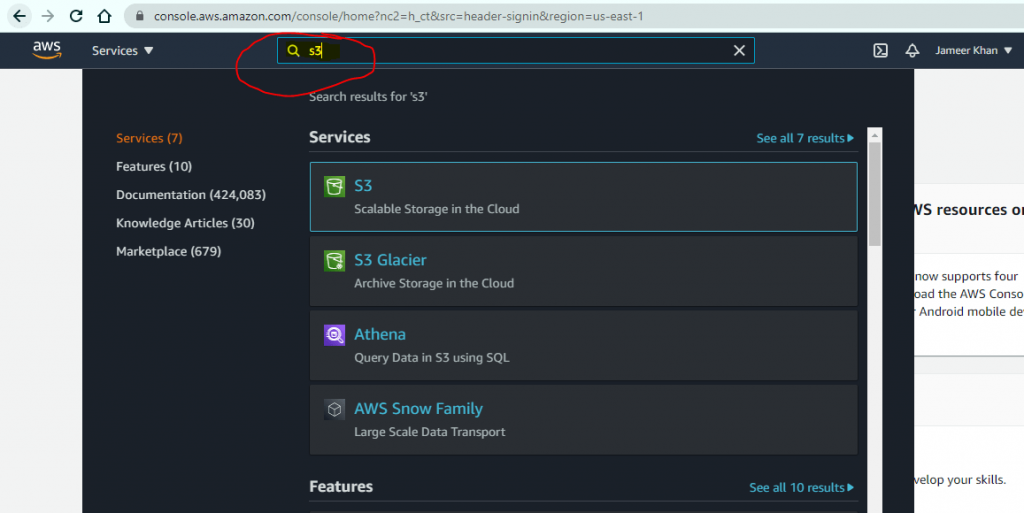
This is the first step towards implementing S3 and CloudFront. Login to AWS Console and search for “S3” in the top search box.
Click “Create Bucket”. Give bucket name a unique name. Choose an “AWS Region” as per your users locations or leave it blank. The region is basically the origin datacenter on which your files will be kept. It must be nearest to the users from where you get most of the traffic.
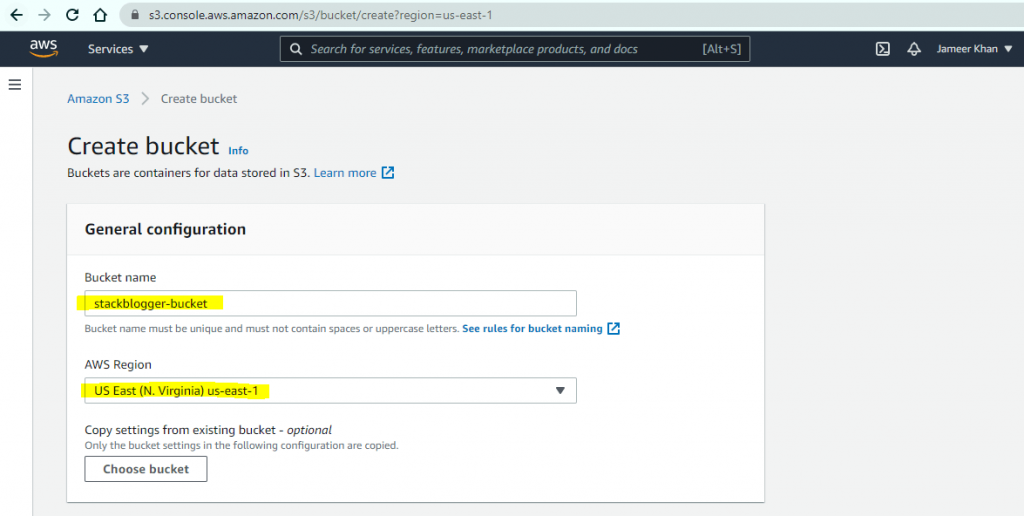
Once you fill Bucket Name and select the appropriate AWS Region, click the “Create Bucket” button. Wait for it to create the bucket.
The bucket is created and it will be listed on the buckets list.

By default, the bucket is disabled for public access. Check the column, it says “Bucket and objects not public”. You need to change the permission of it.
Click on the bucket name to open it and go to the “Permissions” tab.
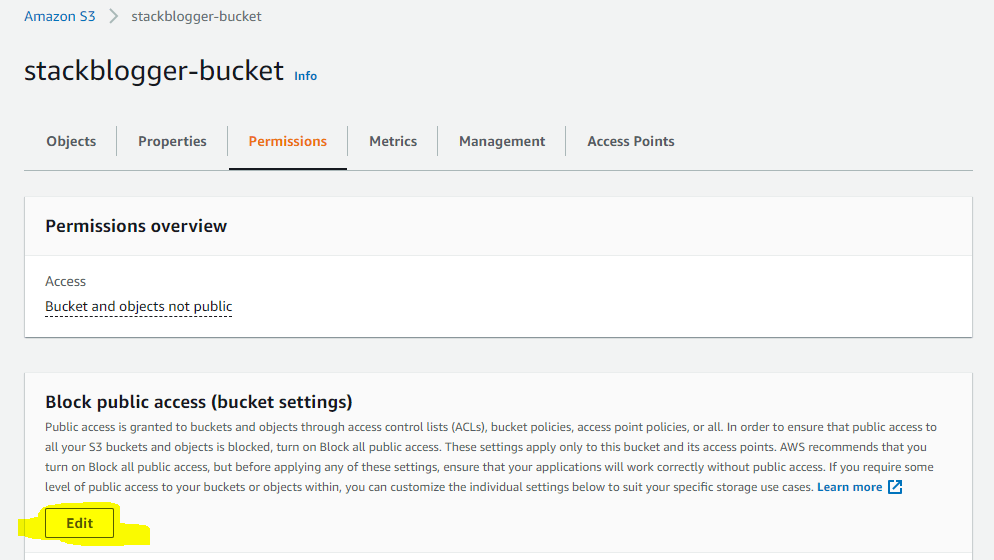
Click the “Edit” button.
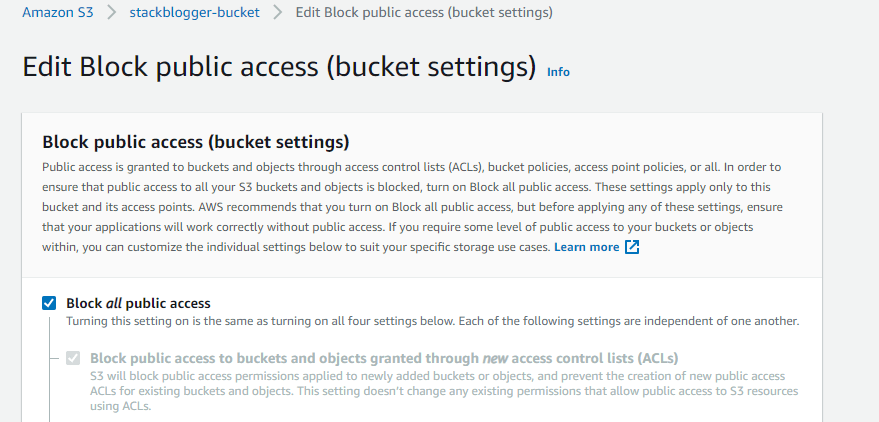
Uncheck the “Block all public access” checkbox and click “Confirm Changes”. It will enable public access to your bucket.
Note: It will make the bucket and all of its objects public.
Now the Bucket is ready to upload files. The next step is to upload files to the bucket.
Upload Static Files to S3 Bucket
Now the bucket is ready and we need to upload our static contents to it. That will be further served with CloudFront. I will upload the contents of bookmymark.com website. You can upload contents of your own website.
Note: Make sure to minify the js and css files. That will help in further improvement.
Click on the “Upload” button and drag and drop all the files that you need to upload to the bucket.
Before clicking the “Upload” button at the bottom, click on “Properties” to modify the meta tag.

In the “Metadata – optional” block, choose “System defined” in the Type field, “Cache-Control” in the Key field, and “604800” in Value.
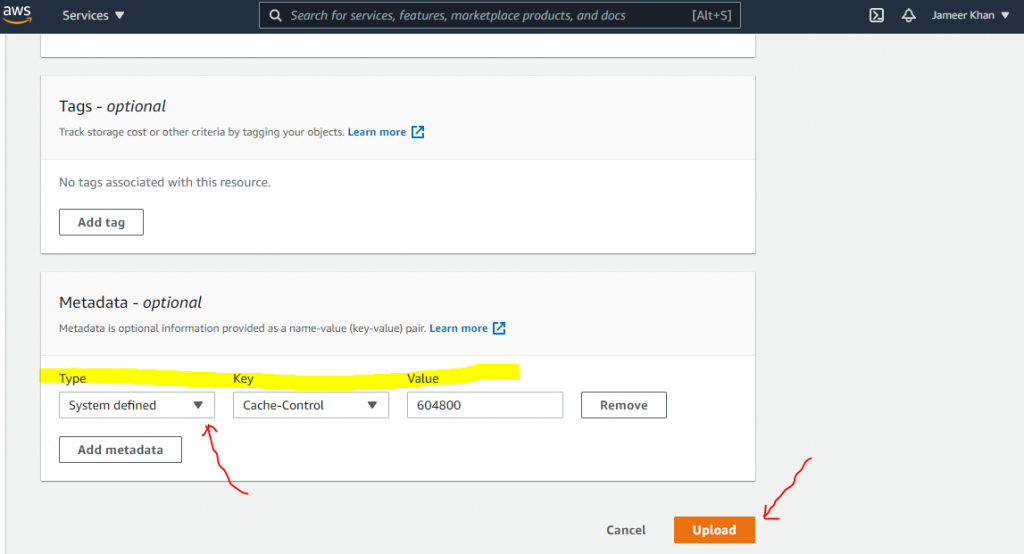
It will add caching of 7 days to all the files you are uploading. Click the “Upload” button now.
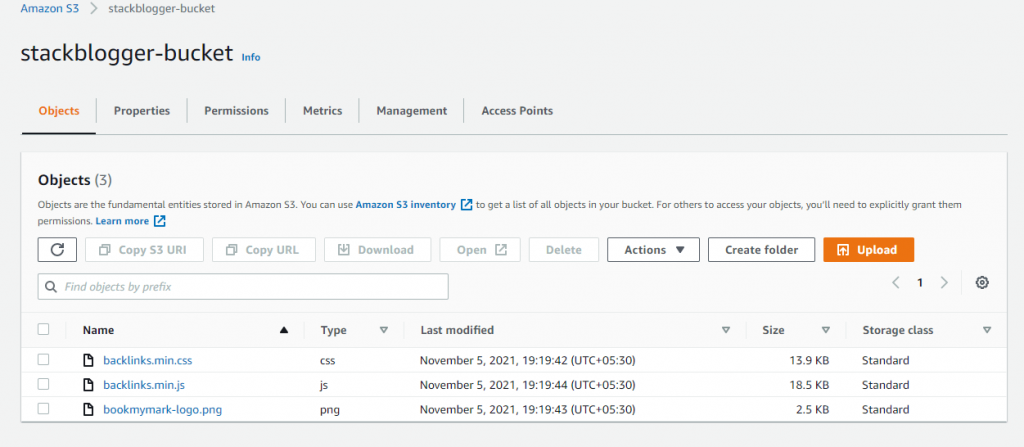
Files are successfully uploaded to S3 Bucket.
Make S3 Files Public
The files uploaded in the S3 bucket are by default private. We need to make them public only then they will be accessible by CloudFront.
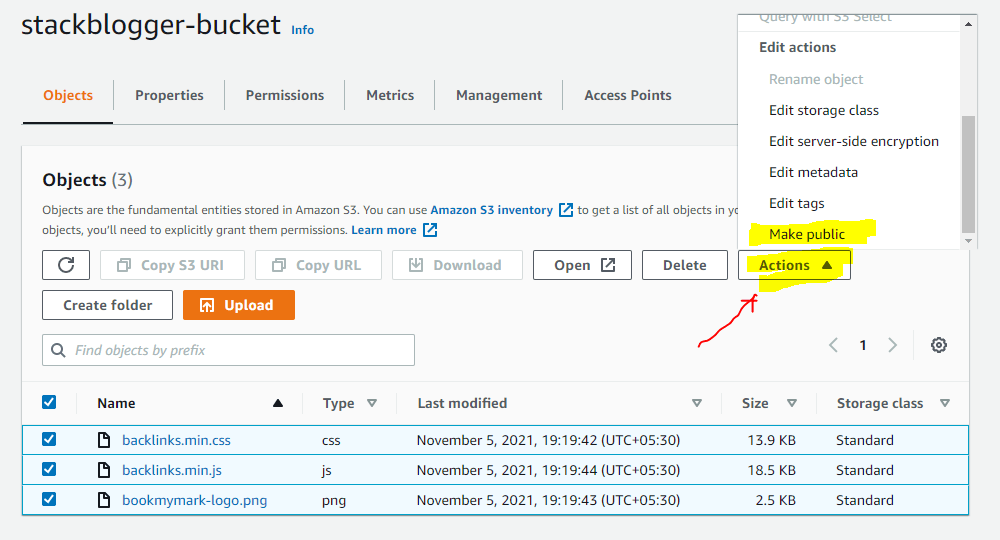
Select all files and click “Actions”. Choose the “Make public” option and click the “Make public” button when you see it on the popup screen.
Setup CloudFront Distribution
The next step is to setup cloudfront distribution. It will be attached to the S3 bucket and distribute the files to various datacenters. If a user accesses a file from a location that is far away from the file origin server location then the CloudFront will serve the file from the nearest server instead of fetching it from the origin server. It is a Content Delivery Network that serves the file from the nearest server.
Search for “CloudFront” in the top search box and open it.

Click the “Create Distribution” button.
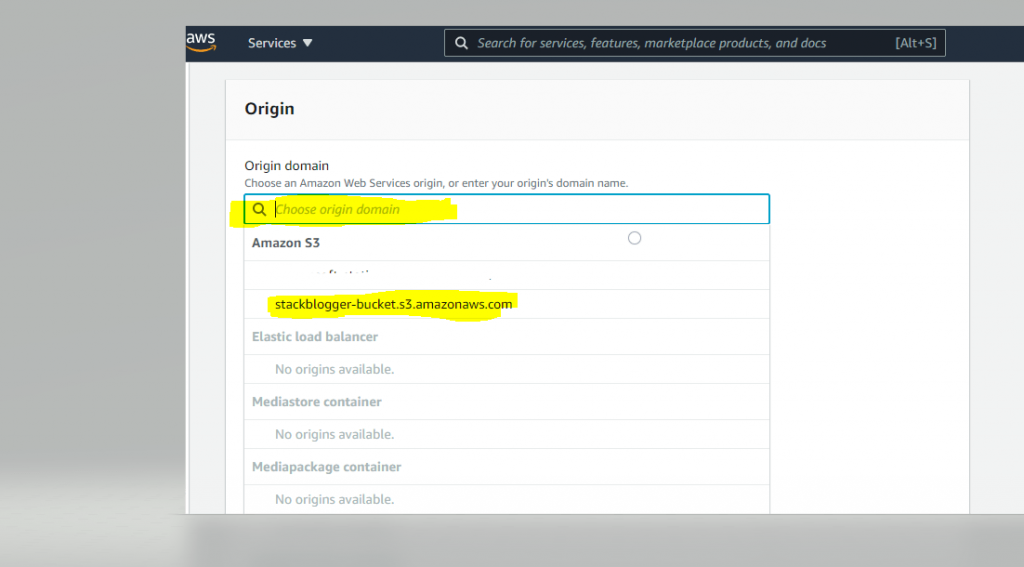
Choose the S3 bucket in the “Origin domain” field. Click the “Create Distribution” button at the bottom.
Wait for the Distribution to become ready. You can refresh to check if it is ready.
Once it is ready, click on the distribution name and open it.
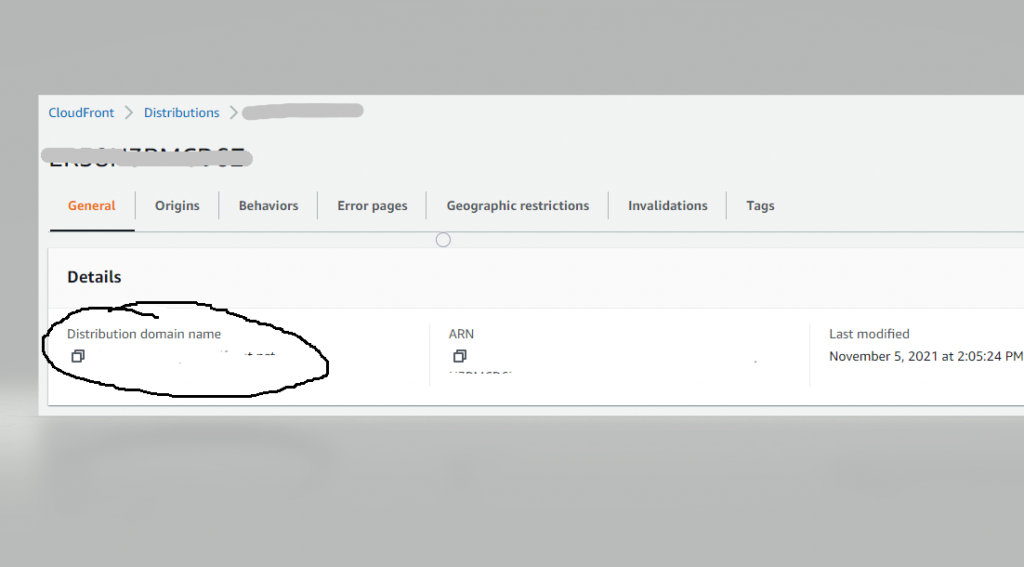
Copy the Distribution domain name from the marked area above. The S3 files will be served at this domain.
Measure the Improved Speed with CloudFront
We are all setup. Open the s3 files using the CloudFront domain.
Append the s3 file name in the last in CloudFront domain.
https://<cloudfront-id>.cloudfront.net/backlinks.min.js
You can use your cloudfront domain and filename and open it in in new tab. Here is my file link.
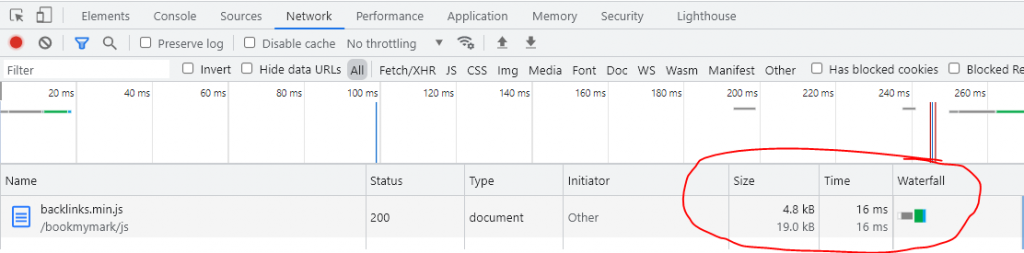
It takes just 16ms to load the file using CloudFront and the size is also compressed to 4.8 kb from 19 kb.
Let’s check the same file speed from the bookmymark.com server without S3 and CloudFront.
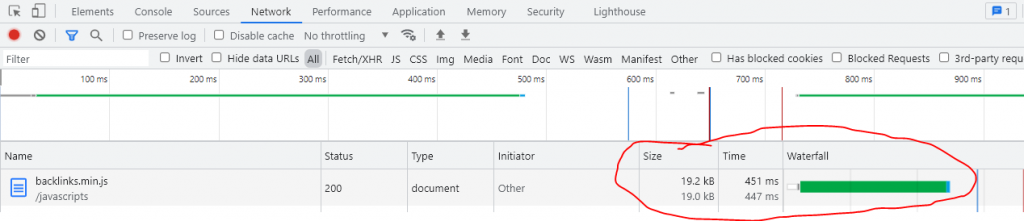
The same file takes 451ms to load and the size is also not compressed.
It shows S3 with CloudFront is more than 20 times faster than the normal server. CloudFront makes not only a website fast but also helps in search engine ranking as the fast website is always preferred than the slow website.
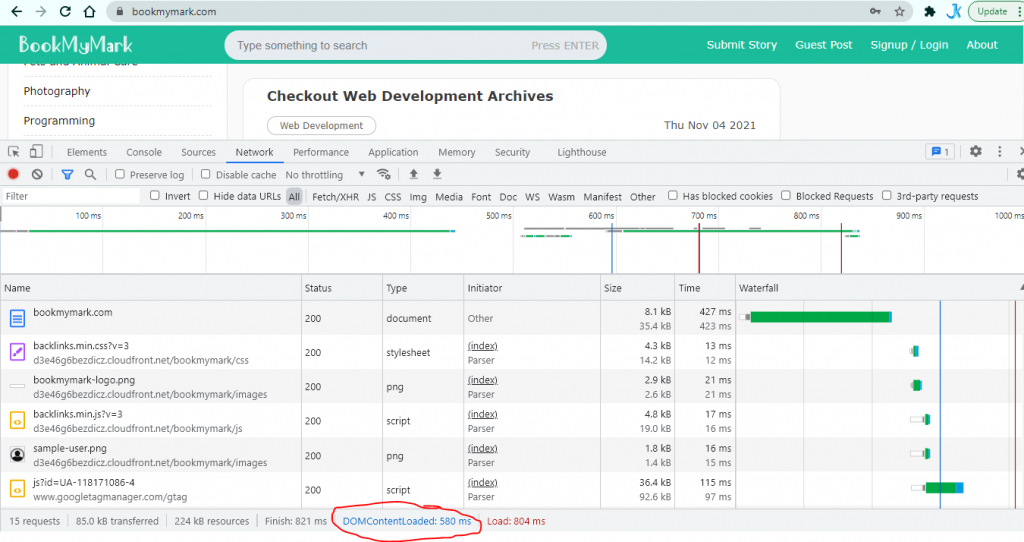
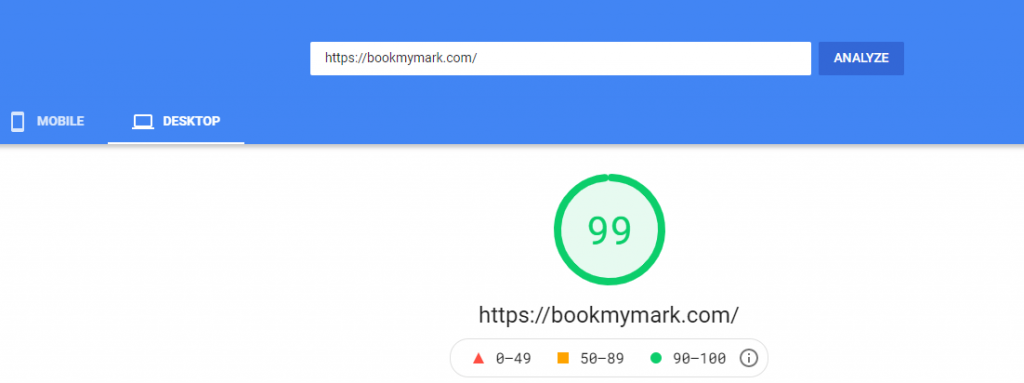
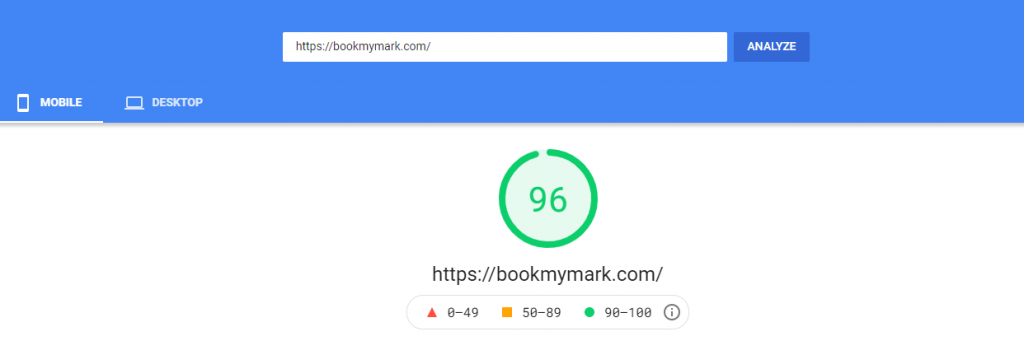
As the CloudFront is implemented in the bookmymark.com website, it loads in just 580ms which is more than better.
Here is what Google Page Insights says about it.
Conclusion
AWS S3 with CloudFront makes a huge difference in the website performance. It improves not only the speed but also the Search Engine Ranking of the website.
This article has covered how to improve website speed with AWS S3 and CloudFront. I hope it will add some value to your website improvement step. Check out the tutorial to further optimize the Angular website: 5 Best Ways To Optimize Angular For Scaling
Thanks For Sharing This Great Post About AWS S3 and CloudFront. Hope Its Work For All