
Microservices architecture has become increasingly popular for building large, complex applications. It allows for independent development, scalability, and fault tolerance. NestJs is a popular Node.js framework that provides a solid foundation for building microservices. Docker is a containerization platform that simplifies the deployment and management of applications. In this guide, we will explore how to build and deploy microservices with NestJs and Docker.
Table of Contents
Prerequisites
Before we get started, make sure you have the following installed on your machine:
Probably worth checking NestJs Unit Testing Best Practices
Create a NestJs Microservice
Let’s create a new NestJs application with the @nestjs/microservices package. Run the following command:
1 2 3 | npm i --save @nestjs/microservices |
Next, create a main.ts file with the following code:
1 2 3 4 5 6 7 8 9 10 11 12 13 14 15 16 17 18 | // main.ts import { NestFactory } from '@nestjs/core'; import { MicroserviceOptions, Transport } from '@nestjs/microservices'; import { AppModule } from './app.module'; async function bootstrap() { const app = await NestFactory.createMicroservice<MicroserviceOptions>( AppModule, { transport: Transport.TCP, }, ); await app.listen(() => console.log('Microservice is listening')); } bootstrap(); |
This code creates a new NestJs microservice using TCP as the transport protocol.
Create a Dockerfile
Now that we have a working microservice, let’s containerize it using Docker. Create a new file called Dockerfile in the root directory of your project with the following code:
1 2 3 4 5 6 7 8 9 10 11 12 13 14 15 16 17 | // Dockerfile FROM node:14-alpine WORKDIR /app COPY package.json ./ COPY tsconfig.json ./ COPY src ./src RUN npm install RUN npm run build COPY . . CMD ["npm", "run", "start:prod"] |
This Dockerfile uses the official Node.js 14 Alpine image, sets the working directory, installs the dependencies, copies the application code, and starts the application in production mode.
Build and Run the Docker Image
Now that we have a Dockerfile, let’s build the Docker image and run it. Run the following commands:
1 2 3 4 | docker build -t my-microservice . docker run -p 3000:3000 my-microservice |
This will build the Docker image and start the container on port 3000.
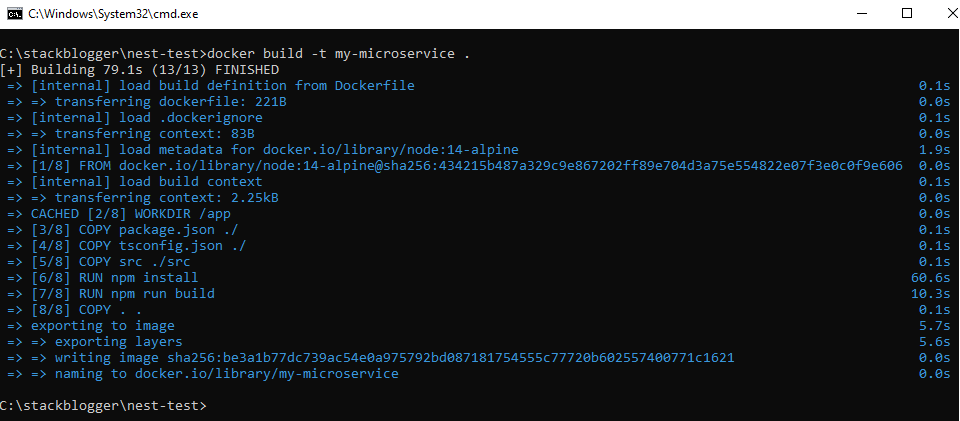
Once the docker build is successful, run the docker run command.
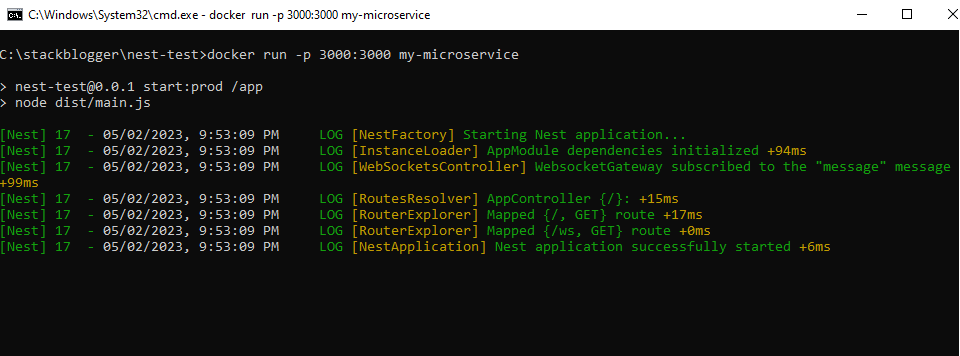
Open http://localhost:3000 in the browser and you see your NestJs application running from Docker.
Conclusion
In this guide, we have explored how to build and deploy microservices with NestJs and Docker. We created a new NestJs microservice, containerized it using Docker, and ran it. With this knowledge, you can start building your own microservices using NestJs and Docker.


")
