Ionic is a hybrid mobile app development JavaScript framework which enables web apps developer to easily build applications that can run on many mobile OS platforms like iOS, Android and Windows. There are many starter projects available in Ionic marketplace which developer can use to start with. The starter project include Sidemenu projects, Tab project and many more. Here we are going to see how we can implement the authentication in Ionic tabs project.
Ionic tabs project is a starter boilerplate provided by Ionic marketplace free of cost for anyone to start with the Ionic app development. It consist a few tabs like Home, Contact Us and About Us. The authentication is by default not provided in the starter boilerplate. We will learn how we can implement the authentication in tabs project.
Steps to implement authentication in Ionic tabs project are as follows-
Table of Contents
1. Create a tab starter project
Our first step is to create a tab starter boilerplate in Ionic. Let’s run the below command to create the boilerplate-
1 | ionic start authentication-in-ionic-tab-project tabs |
The above command will generate an Ionic Tab Starter project.
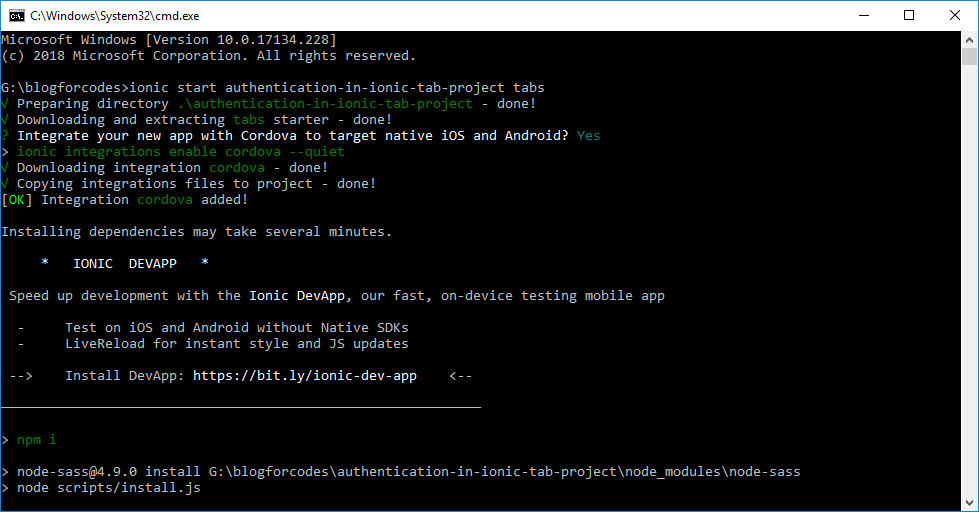
run
$ cd authentication-in-ionic-tab-project
2. Add a service provider
Add a service provider in the project by running following command-
1 | ionic generate provider auth-service |
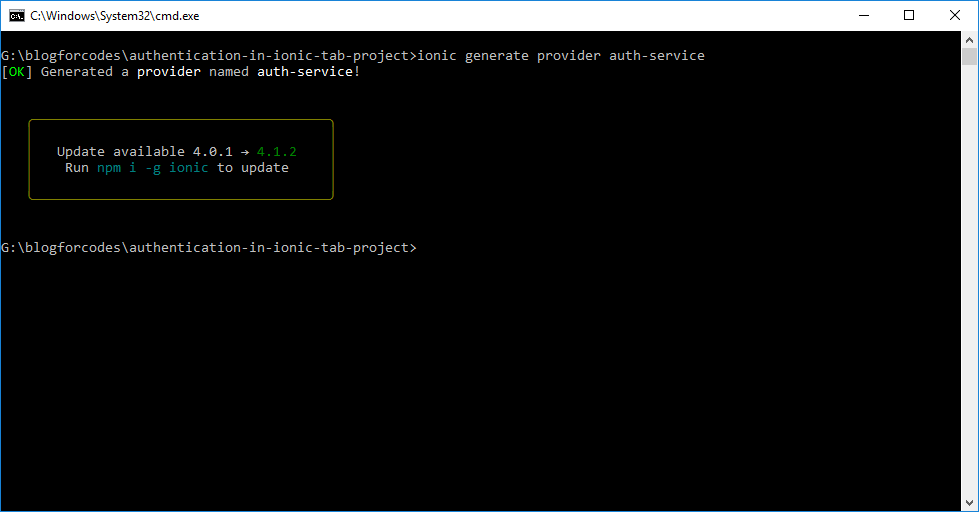
3. Edit the service provider
Open the project in some editor (I am using Visual Studio code) and edit the service provider file. Open the auth-service.ts file in editor and paste below code in that-
1 2 3 4 5 6 7 8 9 10 11 12 13 14 15 16 17 18 19 20 21 22 23 | import { Injectable } from '@angular/core'; import { HttpClient } from '@angular/common/http'; import { Observable } from 'rxjs/Rx'; import 'rxjs/add/operator/map'; /* Generated class for the AuthServiceProvider provider. See https://angular.io/guide/dependency-injection for more info on providers and Angular DI. */ @Injectable() export class AuthServiceProvider { constructor(private http: HttpClient) { } login(data) { return this.http.post('http://localhost:3009/api/login', data) .map(res => res) .catch((error: any) => Observable.throw(error || 'Server error')); } } |
Here I have my server running at http://localhost:3009/ URL.
4. Setup the login page
Generate a login page and edit its code to call auth service provider. Run command below to generate a login page-
1 | ionic generate page login |
Now open the login.html file and paste below code in that-
1 2 3 4 5 6 7 8 9 10 11 12 13 14 15 16 17 18 19 20 21 22 23 24 25 26 27 28 29 30 31 32 33 34 35 36 | <ion-header> <ion-navbar> <ion-title>Login</ion-title> </ion-navbar> </ion-header> <ion-content class="login-content" padding> <ion-row class="logo-row"> <ion-col></ion-col> <ion-col width-67> <img src="http://placehold.it/300x200" /> </ion-col> <ion-col></ion-col> </ion-row> <div class="login-box"> <form (ngSubmit)="login()" #registerForm="ngForm"> <ion-row> <ion-col> <ion-list inset> <ion-item> <ion-input type="text" placeholder="Email" [(ngModel)]="registerCredentials.username" name="username" required></ion-input> </ion-item> <ion-item> <ion-input type="password" placeholder="Password" [(ngModel)]="registerCredentials.password" name="password" required></ion-input> </ion-item> </ion-list> </ion-col> </ion-row> <ion-row> <ion-col class="signup-col"> <button ion-button class="submit-btn" [disabled]="!registerForm.form.valid" full type="submit">Login</button> </ion-col> </ion-row> </form> </div> </ion-content> |
Open login.ts file and paste following code in that-
1 2 3 4 5 6 7 8 9 10 11 12 13 14 15 16 17 18 19 20 21 22 23 24 25 26 27 28 29 30 31 32 33 34 35 36 37 38 39 40 41 42 43 44 45 46 47 48 49 50 51 52 53 54 55 56 57 58 59 60 61 62 63 64 65 | import { Component } from '@angular/core'; import { NavController, NavParams, AlertController, LoadingController, Loading, IonicPage } from 'ionic-angular'; import { AuthServiceProvider } from '../../providers/auth-service/auth-service'; import { TabsPage } from '../tabs/tabs'; /** * Generated class for the LoginPage page. * * See https://ionicframework.com/docs/components/#navigation for more info on * Ionic pages and navigation. */ @IonicPage() @Component({ selector: 'page-login', templateUrl: 'login.html', }) export class LoginPage { loading: Loading; registerCredentials = { username: '', password: '' }; constructor(private nav: NavController, private auth: AuthServiceProvider, private alertCtrl: AlertController, private loadingCtrl: LoadingController) { this.registerCredentials.username = localStorage.getItem('email'); } public login() { localStorage.setItem('email', this.registerCredentials.username); this.showLoading(); this.auth.login(this.registerCredentials).subscribe((token: any) => { if (token) { localStorage.setItem('token', token.token); this.nav.push(TabsPage); } else { this.showError("Access Denied"); } }, error => { this.showError(error.error ? error.error.message : 'Invalid user'); }); } showLoading() { this.loading = this.loadingCtrl.create({ content: 'Please wait...', dismissOnPageChange: true }); this.loading.present(); } showError(text) { this.loading.dismiss(); let alert = this.alertCtrl.create({ title: 'Fail', subTitle: text, buttons: ['OK'] }); alert.present(); } ionViewDidLoad() { console.log('ionViewDidLoad LoginPage'); } } |
5. Setup authentication handler
We need to setup a Core Authentication handler file which will run on every request and will check for user authenticity. If user is not authorized or the token is expired, it will throw the user to login page.
Create a manually file auth-service-core.ts in /src/app/core folder.
Note: If core folder doesn’t exist in /src/app, please create one manually.
Paste the following code in auth-service-core.tsfile-
1 2 3 4 5 6 7 8 9 10 11 12 13 14 15 16 17 18 19 20 21 22 23 24 25 26 27 28 | import { Injectable } from '@angular/core'; import { JwtHelperService } from '@auth0/angular-jwt'; @Injectable() export class AuthServiceCore { authState: any = null; helper: any; token: string; constructor() { this.helper = new JwtHelperService(); } public isAuthenticated(): boolean { this.token = localStorage.getItem('token'); // Check whether the token is expired and return // true or false return !this.helper.isTokenExpired(this.token); } // Returns current user data get currentUser(): any { this.token = localStorage.getItem('token'); return this.helper.decodeToken(this.token); } } |
Here we need to install a new dependency @auth0/angular-jwt. Run below command to install it-
1 | npm install --save @auth0/angular-jwt |
Import the @auth0/angular-jwtmodule in app.module.tsfile.
1 2 3 4 5 6 7 8 9 10 11 12 13 14 15 16 17 18 19 20 21 22 23 24 25 26 27 28 29 30 31 32 33 34 35 36 37 38 39 40 41 42 43 44 45 46 47 48 49 50 51 52 53 | ... import { JwtModule, JWT_OPTIONS } from '@auth0/angular-jwt'; import { AuthServiceCore } from './core/auth-service-core'; ... export function tokenGetter() { return localStorage.getItem('token'); } export function domain() { return 'http://localhost:3009'; } export function jwtOptionsFactory() { return { tokenGetter: () => { return tokenGetter(); }, whitelistedDomains: [domain()], blacklistedRoutes: [ domain() + '/api/login/', domain() + '/api/signup/' ], headerName: 'x-access-token', authScheme: '' } } @NgModule({ declarations: [ ... ], imports: [ ... JwtModule.forRoot({ jwtOptionsProvider: { provide: JWT_OPTIONS, useFactory: jwtOptionsFactory, } }) ], bootstrap: [ ... ], entryComponents: [ ... ], providers: [ ... AuthServiceCore ] }) export class AppModule { } |
Open app.component.ts file and paste following code in that-
1 2 3 4 5 6 7 8 9 10 11 12 13 14 15 16 17 18 19 20 21 22 23 24 25 26 27 28 29 30 31 32 33 34 35 36 37 38 39 | import { Component, ViewChild } from '@angular/core'; import { Nav, Platform } from 'ionic-angular'; import { StatusBar } from '@ionic-native/status-bar'; import { SplashScreen } from '@ionic-native/splash-screen'; import { TabsPage } from '../pages/tabs/tabs'; import { LoginPage } from '../pages/login/login'; import { AuthServiceCore } from './core/auth-service-core'; @Component({ templateUrl: 'app.html' }) export class MyApp { @ViewChild(Nav) nav: Nav; rootPage: any = TabsPage; pages: Array<{ title: string, component: any }>; constructor(public platform: Platform, public statusBar: StatusBar, public splashScreen: SplashScreen, private auth: AuthServiceCore) { this.initializeApp(); } initializeApp() { var that = this; this.platform.ready().then(() => { // Okay, so the platform is ready and our plugins are available. // Here you can do any higher level native things you might need. this.statusBar.styleDefault(); this.splashScreen.hide(); if (that.auth.isAuthenticated()) { that.nav.setRoot(TabsPage); } else { that.nav.setRoot(LoginPage); } }); } } |
Now run the project using ionic servecommand. When you run the project, it will throw an error on browser Cannot find module 'rxjs/internal/Observable'. To solve the error, follow the blog How to solve Observable error.
If you don’t want to open another blog post, you can just paste this two line in package.json file.
1 2 | "rxjs": "^6.2.2", "rxjs-compat": "^6.1.0", |
And run npm install
Now again run the project using command ionic serveIt will throw the error- Error: No component factory found for LoginPage. Did you add it to @NgModule.entryComponents?
We need to import LoginPage component in app.module.ts file. Do it like this-
1 2 3 4 5 6 7 8 9 10 11 12 13 14 15 16 17 18 19 20 21 22 23 24 | ... import { LoginPage } from '../pages/login/login'; ... @NgModule({ declarations: [ ... LoginPage ], imports: [ ... ], bootstrap: [ ... ], entryComponents: [ ... LoginPage ], providers: [ ... ] }) export class AppModule { } |
Run the project now. You will see the login screen on browser.
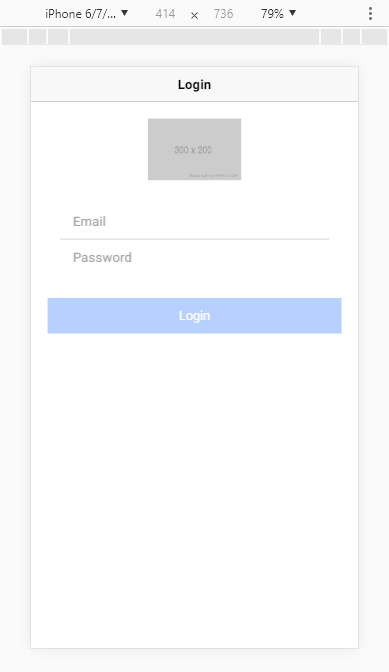
Try to enter some credentials and hit Login button-
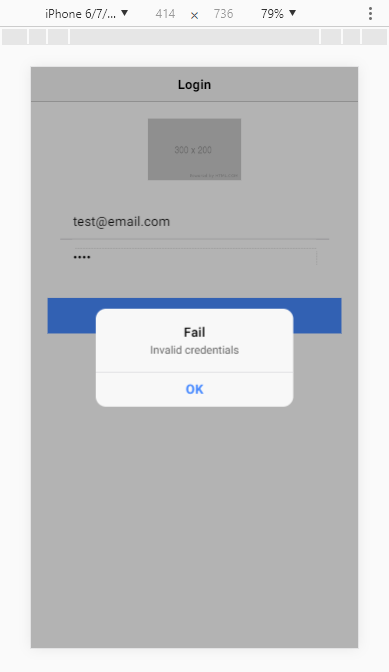
The page is working properly. Now enter a valid credential and hit Login button-
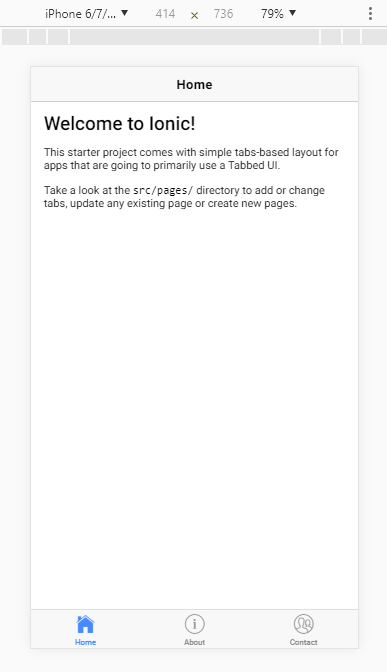
You can see the page is redirected from Login to Home page.
That’s the all stuff for now.
Would love to hear your comments pls
Thanks 🙂


![5 Best Sites To Learn JavaScript [FREE] In 2022 5 Best Sites To Learn JavaScript [FREE] In 2022](https://cdn.stackblogger.com/wp-content/uploads/2021/11/FREE-Sites-to-Learn-JavaScript-min-370x235.png)

