

Angular 15 is one of the latest versions of the popular Angular framework, which is widely used for developing web applications. With the rise of social media platforms, social login has become an essential feature for web applications to provide a seamless user experience. In this article, we will discuss how to integrate Google social login in Angular 15 with step by step tutorial.
Table of Contents
Google Social Login
Google Social login is a popular social login option for web applications. With the Google social login, users can sign in to the web application using their Google account credentials. This eliminates the need for users to create a separate account for the web application, making the login process simpler and faster.
Integrating Google Social Login in Angular 15
To integrate Google social login in Angular 15, we need to use the Google API client library. The Google API client library provides a simple and easy-to-use interface for accessing Google services.
Install Angular 15
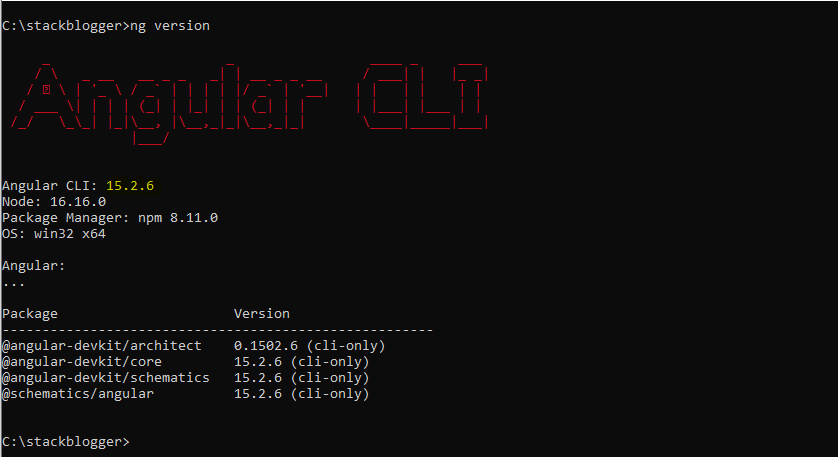
Install Angular 15 on your machine. If already installed, check version.
Creating a Google API Project
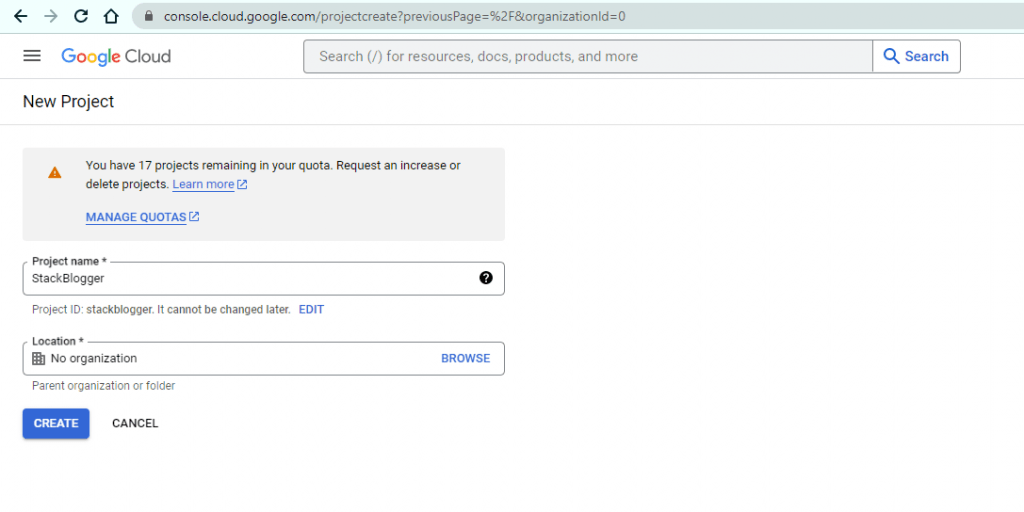
To use Google social login in our Angular application, we first need to create a Google API project. We can create a Google API project by following the below steps:
- Go to the Google Developers Console (https://console.developers.google.com/) and sign in.
- Click the “Create Project” button and follow the prompts to create a new project.
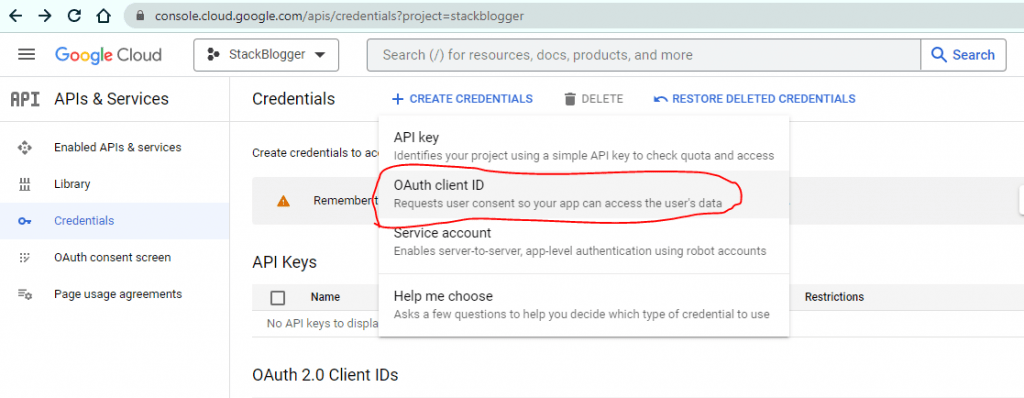
- Once the project is created, click on the “Credentials” tab in the left sidebar.
- Click on the “Create credentials” button and select “OAuth client ID”.
- Select “Web application” as the application type.
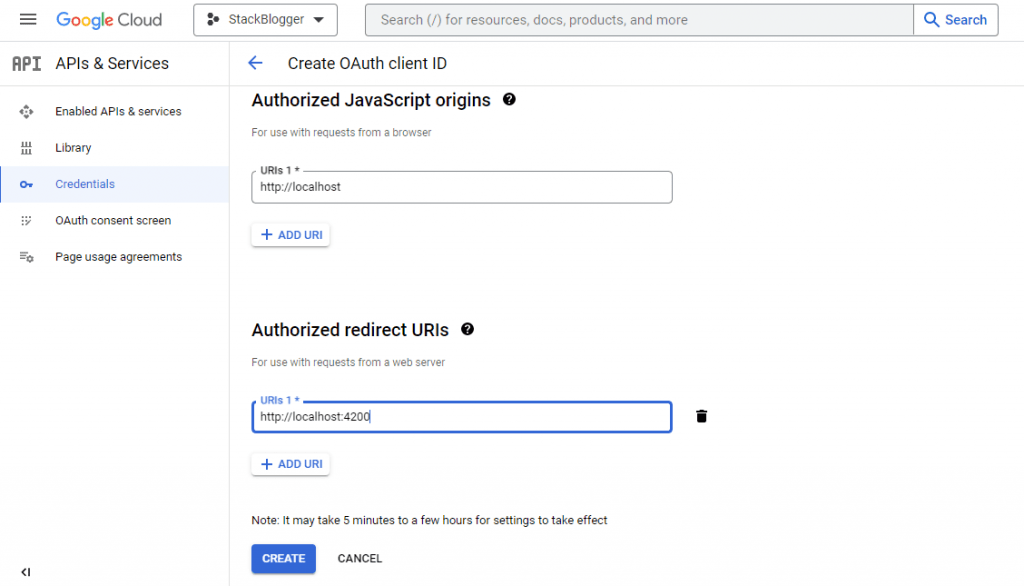
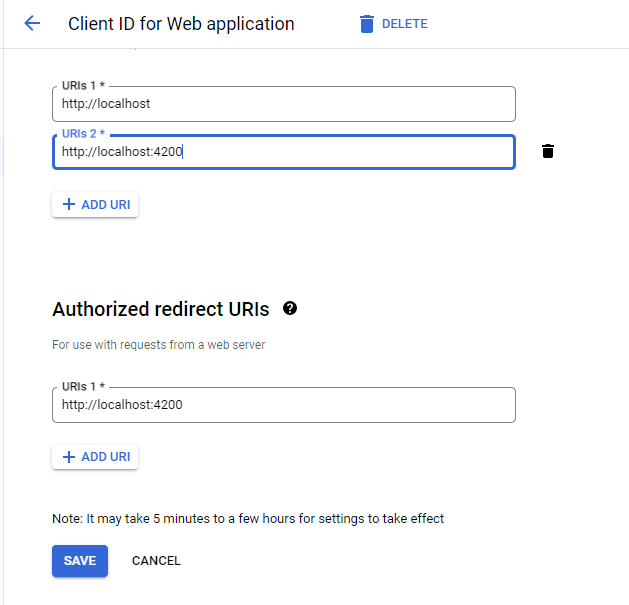
- Set the Authorized JavaScript origins to
http://localhost:4200(assuming you’re running the Angular app locally). - Set the authorized redirect URIs to
http://localhost:4200andhttp://localhost:4200/(note the trailing slash). - Click “Create” and copy the client ID.
Select External from the radio buttons. Provide some name to AppName field. Select User Support Email. Enter a developer email. Click Save and Continue on every wizard steps.
Go to Credentials, create Web Application Client ID.
Note: If you have a different redirect uri then you need to provide that in “Authorized redirect URIs” field. For example if I am running a backend service on port
3000and callback url isgoogle/auth/redirectthen my redirect uri will behttp://localhost:3000/google/auth/redirectand I need to put it in Google.
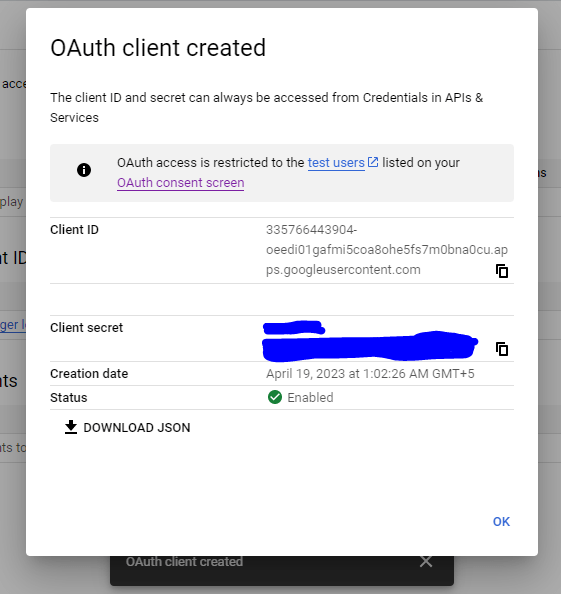
Copy and ClientID displayed in the Popup.
Install Angular 15 Supported Social Login Plugin
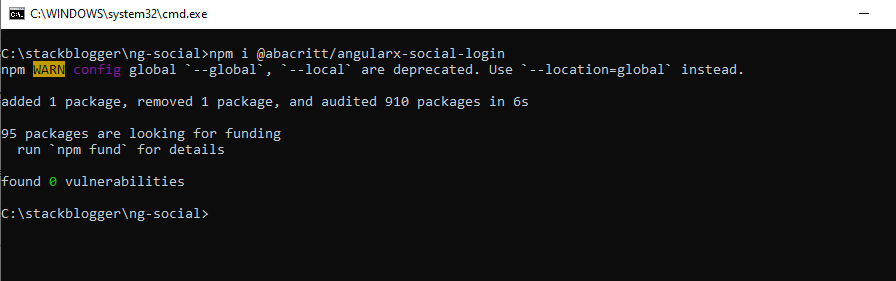
Install the Angular 15 Supported Google Social Plugin in the application.
1 2 3 | npm install @abacritt/angularx-social-login |
Include Required Modules and Setup Plugin
Next, we need to add the Google client ID to our Angular app. In the app.module.ts file, import the SocialLoginModule from angularx-social-login and add it to the imports array. Then, add the following code to the providers array:
1 2 3 4 5 6 7 8 9 10 11 12 13 14 15 16 17 18 19 20 21 22 23 24 25 26 27 28 29 30 31 32 33 34 35 36 37 38 39 40 | import { NgModule } from '@angular/core'; import { BrowserModule } from '@angular/platform-browser'; import { AppRoutingModule } from './app-routing.module'; import { AppComponent } from './app.component'; import { SocialLoginModule, SocialAuthServiceConfig, } from '@abacritt/angularx-social-login'; import { GoogleLoginProvider } from '@abacritt/angularx-social-login'; @NgModule({ declarations: [AppComponent], imports: [BrowserModule, AppRoutingModule, SocialLoginModule], providers: [ { provide: 'SocialAuthServiceConfig', useValue: { autoLogin: false, providers: [ { id: GoogleLoginProvider.PROVIDER_ID, provider: new GoogleLoginProvider( '<REPLACE-ME-WITH-CLIENT-ID>' ), }, ], onError: (err) => { console.error(err); }, } as SocialAuthServiceConfig, }, ], bootstrap: [AppComponent], }) export class AppModule {} |
Make sure to replace <REPLACE-ME-WITH-CLIENT-ID> with the actual client ID you copied from the Google Developers Console.
Add the Google Login Button
Finally, we can add some minor service codes in app.component.ts file.
1 2 3 4 5 6 7 8 9 10 11 12 13 14 15 16 17 18 19 20 21 22 23 | import { Component, OnInit } from '@angular/core'; import { SocialAuthService, SocialUser } from '@abacritt/angularx-social-login'; @Component({ selector: 'app-root', templateUrl: './app.component.html', styleUrls: ['./app.component.scss'], }) export class AppComponent implements OnInit { user!: SocialUser; constructor(private authService: SocialAuthService) { } ngOnInit() { this.authService.authState.subscribe((user) => { this.user = user; }); } } |
The user variable is of type SocialUser, which is a model provided by the @abacritt/angularx-social-login library to represent the user data after a successful social login.
The constructor initializes the SocialAuthService instance by injecting it as a dependency. The authService variable is used to handle social authentication in the component.
The ngOnInit() method is a lifecycle hook that is called when the component is initialized. Inside this method, we subscribe to the authState observable provided by the SocialAuthService to listen for changes in the authentication state. When a user logs in or logs out, the user variable is updated with the corresponding user data.
1 2 3 4 5 6 7 8 9 10 | <div *ngif="user"> <p>Welcome, {{ user.name }}!</p> <img src="{{ user.photoUrl }}" alt="{{ user.name }}'s photo"> <p>Email: {{ user.email }}</p> <p>Provider: {{ user.provider }}</p> </div> |
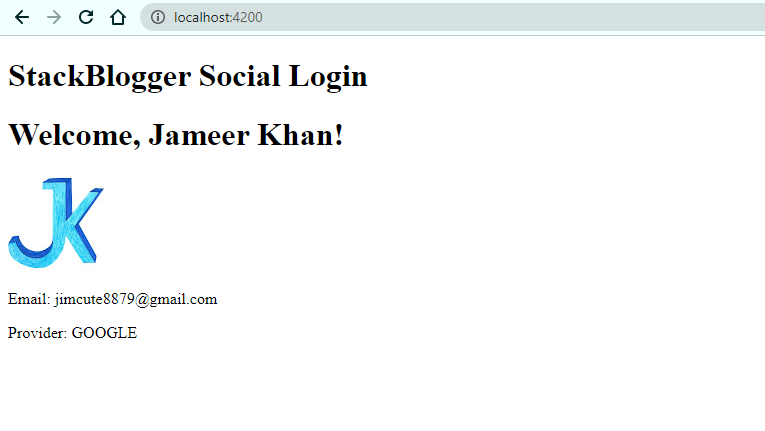
In this part of the code, we define the HTML template for the AppComponent. It displays the user’s information if the user is logged in, including their name, profile photo, email, and provider.
Check the Results
That’s it! Now you should be able to sign in with Google account.
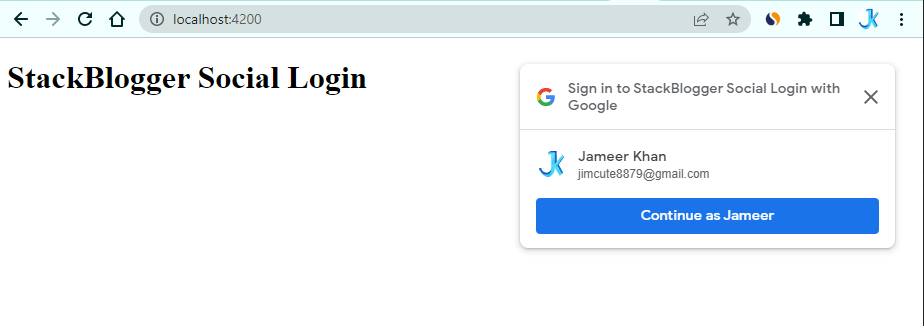
Clicking on the “Continue as Jameer” button will initiate the Google login process, and upon successful authentication, you will be logged in using your Google account. Once logged in, you will be able to view your Google account details displayed on your page.
Common Errors While Integrating Google Login
There could be some common errors that may occur while integrating Google Social Login. I will point some of them here.
The current origin isn’t registered with the Google OAuth Client
If you are using Angular Social Login and encountering the error message “The current origin isn’t registered with the Google OAuth Client”, it means that you have not registered “localhost” or “localhost:4200” domain as an authorized domain in your Google Cloud Platform (GCP) project for Google OAuth client.
- Go to the GCP Console (https://console.developers.google.com/).
- Navigate to the project associated with your OAuth Client.
- Click on the “Credentials” tab in the left-hand menu.
- Find your OAuth Client ID in the list of credentials and click on it.
- Scroll down to the “Authorized JavaScript origins” section.
- Click on the “Add URI” button.
- In the “URI” field, enter “http://localhost:4200” and “http://localhost”. Please ensure that you add both the URL with the port and the URL without the port as authorized Javascript origins in your Google Cloud Platform (GCP) project.
- Click “Save” to save your changes.
Conclusion
In conclusion, the provided code implements social login with Google in an Angular application using the @abacritt/angularx-social-login library. It includes importing the necessary dependencies, defining the component with a SocialUser variable to store the user data, and subscribing to the authState observable to listen for changes in the authentication state.


")
")