NodeMCU is a low cost Open Source IoT platform to control hardware devices using software. In this article we will talk about how to fix setting number failed error in firebase nodemcu. This error comes when you have firebase used in your NodeMCU Arduino project and the firebase fingerprint is expired.
The problem comes when your NodeMCU is unable to connect to firebase.
Table of Contents
Generate a new Firebase Fingerprint
As the Firebase Fingerprint is expired, you need to generate a new firebase fingerprint and use in your code.
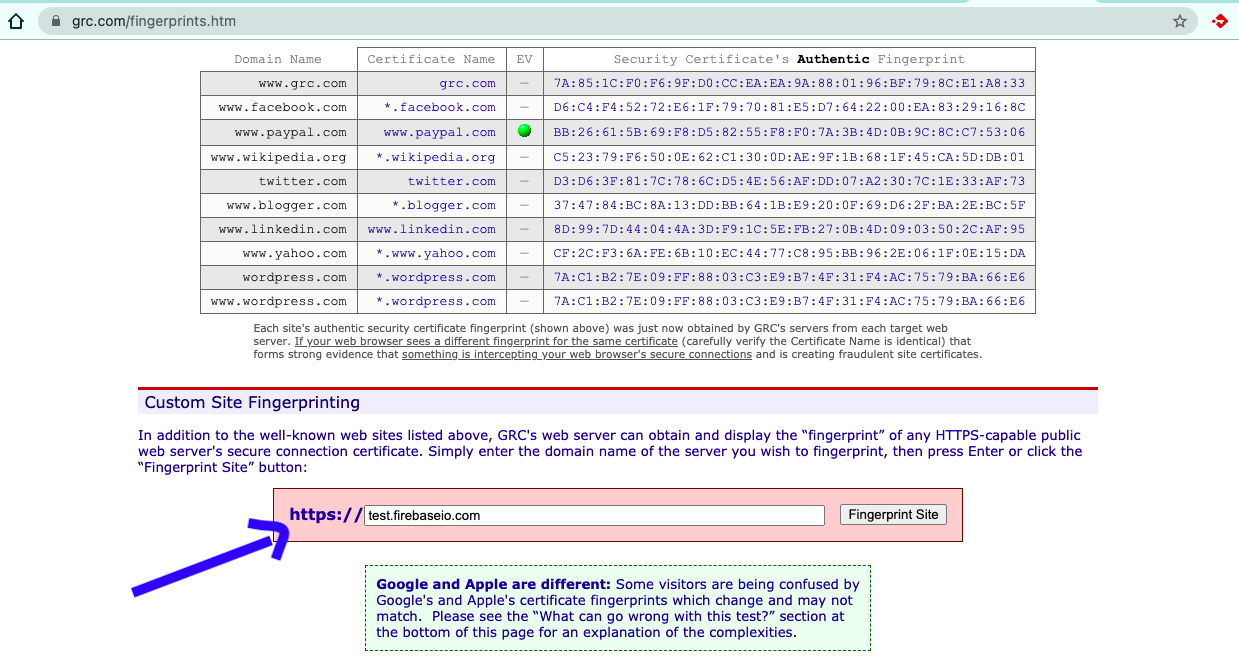
- Go to https://www.grc.com/fingerprints.htm
- Enter your firebase address (xxxx.firebaseio.com) in the search textbox
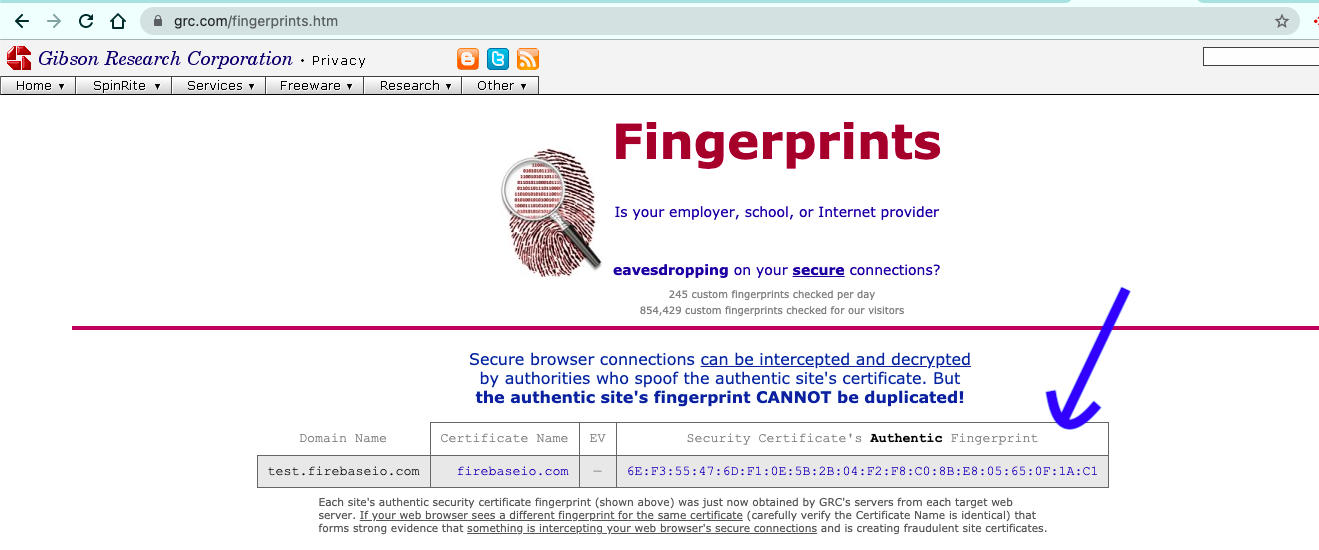
- Click on “Fingerprint Site”
- Copy the fingerprint value from “Security Certificate’s Authentic Fingerprint” column


Paste firebase fingerprint in your code
The next step is to paste the copied fingerprint value in your code.
If you are on Windows, go to following path-
C:/Users/{username}/My Documents/Arduino/libraries/firebase-arduino-master/src
Open FirebaseHttpClient.h file
Replace the existing fingerprint value with the new one and save the file.
Build and upload the code
Do not change anything in your project code. Just build it again and upload to your NodeMCU using Arduino.
Test the thing and it should work.
Conclusion
We learnt about how to fix the error setting number failed firebase NodeMCU. NodeMCU is a device used as a bridge between hardware and software. We control hardware devices with the help of NodeMCU from our smartphones.


1 thought on “Setting number failed Firebase NodeMCU”